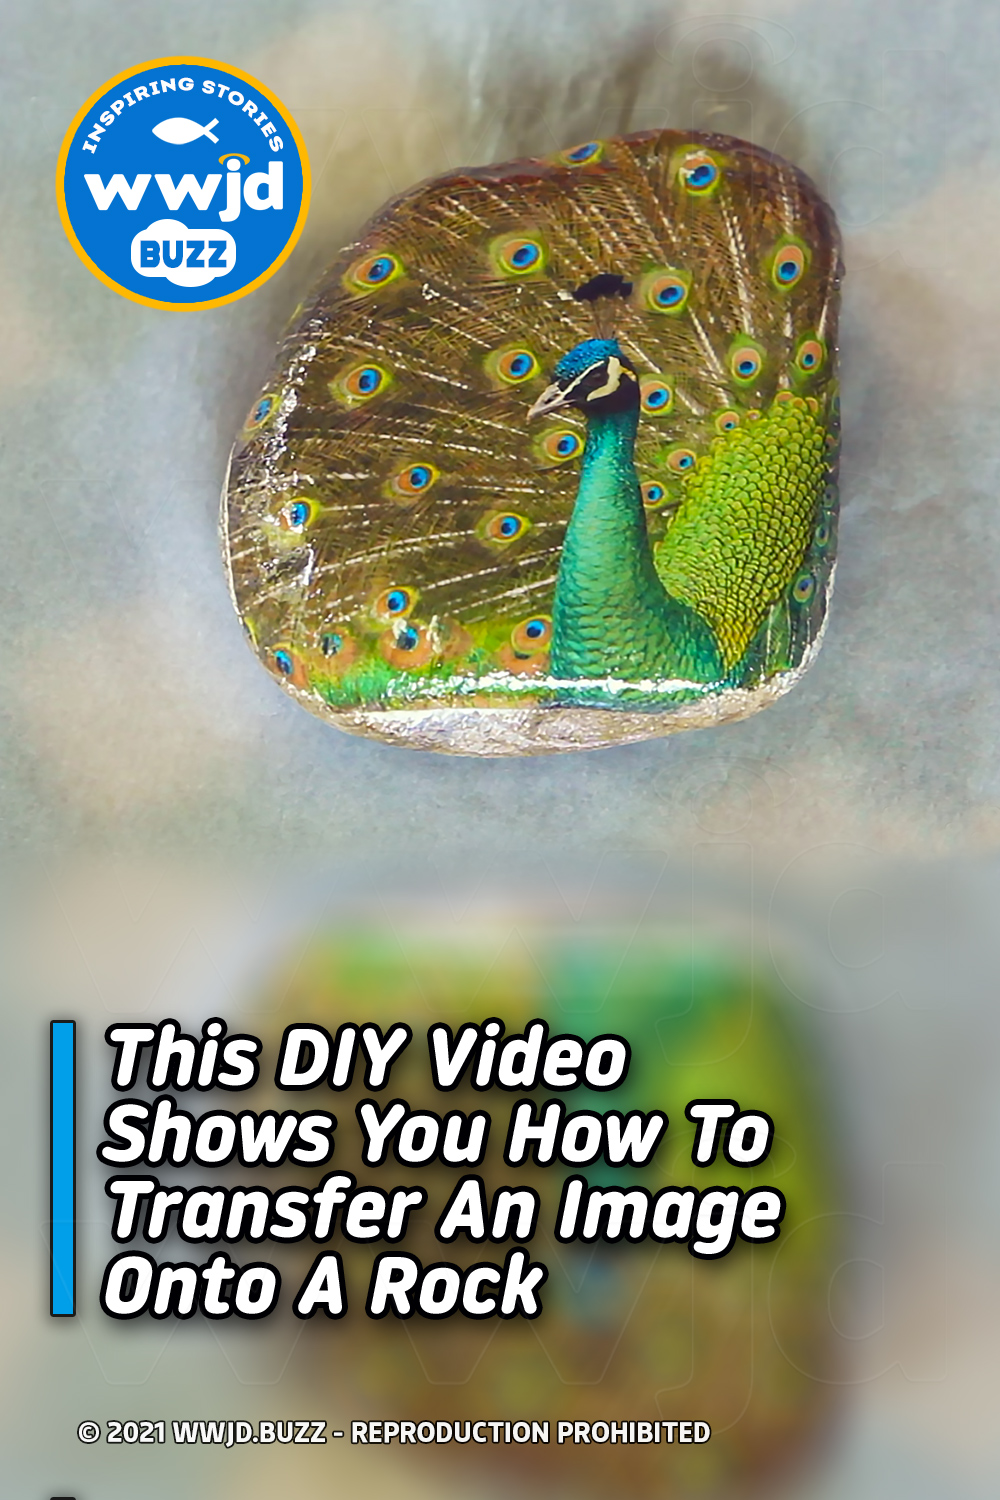
“Picture transfers can be extremely beautiful on wood items since it adds such an antiqued atmosphere, but did you know that you can transfer pictures onto rocks as well? This opens up so many other possibilities.
Scott Holstein of Scott Holstein Photography shares a video tutorial of how to transfer a printed image onto a rock. It is such a simple, quick project that once you see how it’s done, you’ll be out looking for rocks right away.
Supplies:
● Smooth rock
● Picture printed with a laser printer
● Gel medium (like Mod Podge)
● White acrylic paint
● A couple of paint brushes
● Sealant (like Spar urethane in spray form)
Start off by sizing your chosen picture to fit your rock. Note that the picture you choose must be printed from a laser printer on regular copier paper. Inkjet pictures will not work for this process, unfortunately.
Thoroughly clean your rock and make sure it is completely dry. Then brush the white acrylic paint onto the surface of the rock where you will be transferring the image to.
Once the paint has dried, apply a smooth but generous layer of your gel medium to the white area on the rock. Immediately place your image face down onto it. Gently press the picture onto your rock surface and carefully work out any air bubbles or wrinkles.
Once the gel medium has completely dried, moisten the paper with a little bit of water on your fingers or a paintbrush. As the paper begins to soften, very gently begin rubbing the paper off with your fingers. You may have to repeat the wetting process a few times to get all of the paper off. It won’t take long, but don’t rush it by over-wetting the paper all at once or by rubbing too hard.
Let the rock dry again once all of the paper is removed. You may see a thin, white haze appear on your picture, but don’t worry about it because that will disappear once you put your sealant on it.
Following the drying times listed on the bottle of your chosen sealant, apply several thin layers of your sealant to your rock to protect it from the elements. That’s all there is to it.
It’s amazing how vibrant the colors look once the rock is sealed. It almost looks like it’s been hand-painted. This makes a great craft for rock accents around your home or garden, and of course, makes excellent gifts. If you want, you can even personalize your rock by writing a message on the back before you seal it.”